The Formation Label Is Not the Whole Formation
See how a football formation label can hide a team’s changing jobs, from building through midfield to protecting space after possession turns over.
Why does a team listed in a 4-3-3 sometimes attack with five players across the front and defend with two forwards pressing together? A football formation label gives you a useful first clue, but the match phase changes what each player must do. Follow one invented match sequence and the reason for those shifting lines becomes clear.
Imagine Northbridge, a fictional side, facing an opponent that presses high. At the restart, its 4-3-3 looks familiar: a back four, one holding midfielder, two advanced midfielders and a front three. The revealing moment comes when the opponent’s striker blocks the pass into the holding midfielder. Northbridge’s answer is not simply to change formation; it is to solve a specific passing problem.
Why does the press change the build-up?
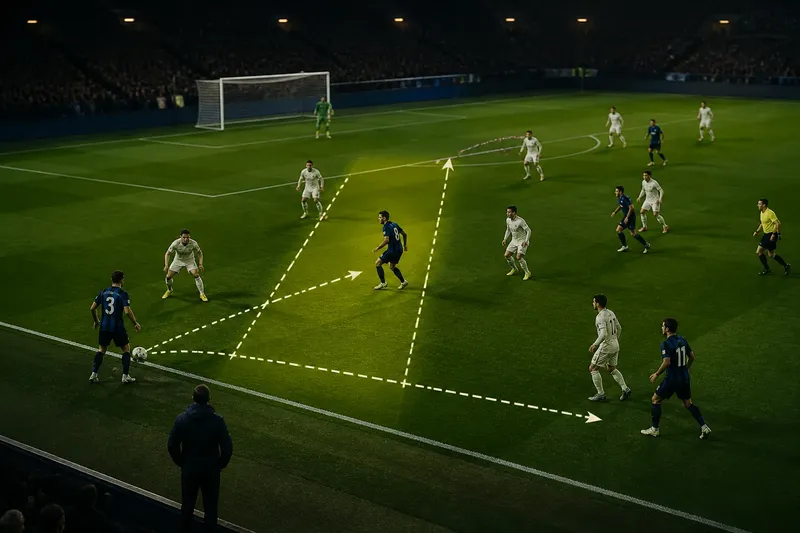
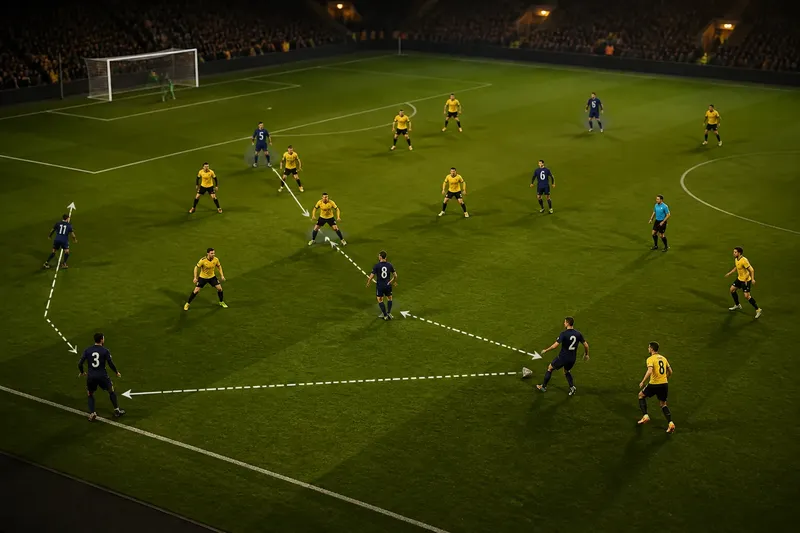
Northbridge’s goalkeeper passes to the left centre-back. The opposing striker curves his run to block the route back across the defence, while a midfielder steps toward Northbridge’s holding player. If the centre-back forces the pass into that crowded lane, the receiver may be trapped with his back to goal.
Instead, Northbridge’s right-back moves into the central lane, away from the touchline. The holding midfielder stays close enough to offer support, and the left-back remains wider on the other side. The centre-back can now choose between a short pass inside and a longer diagonal pass toward the left-back. The movement matters because it gives the ball carrier a new angle, not because a different number has appeared on a team sheet.
The opposing press still has choices. If its winger follows the right-back inward, space may open outside for Northbridge’s right winger. If the winger stays wide, the right-back may receive facing forward. Either way, the receiver’s first touch and the nearby cover determine whether the opening is usable.
How does Northbridge create a route forward?
Once the right-back receives inside, the two advanced midfielders separate: one checks toward the ball, while the other stays between the opponent’s midfield and defence. The right winger holds the touchline, the striker occupies the centre-backs, and the left winger moves closer to the far post. These positions stretch the defenders across several lanes.
Northbridge’s centre-back passes to the right-back, who turns away from the approaching midfielder and plays to the checking midfielder. That player lays the ball off to the holding midfielder, who switches play to the left-back. The sequence is an invented illustration, not a report of a real match. Its observable result is a change in the point of attack: the ball reaches the far side before the opponent’s midfield can shift across.
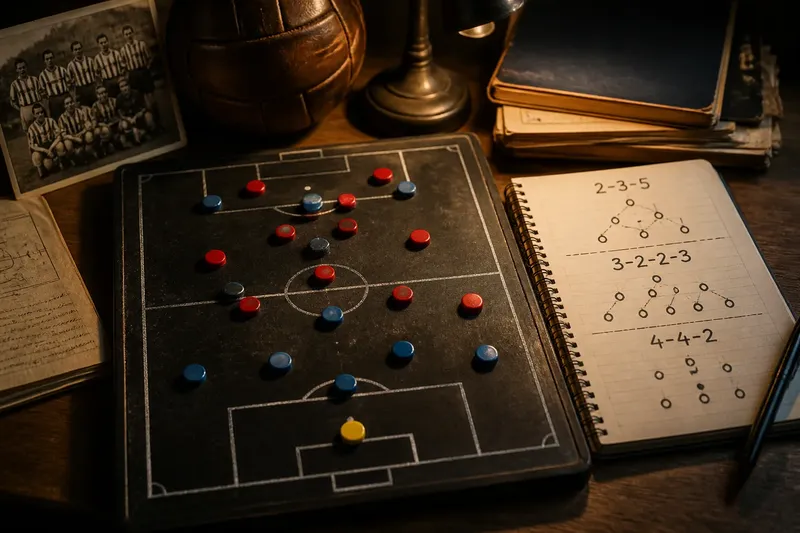
Northbridge now has a familiar attacking picture, sometimes described as a 2-3-5: two centre-backs behind a line of three, with five players occupying advanced lanes. That label helps describe the team’s spacing, but the useful tactical detail is how each position supports the next pass. The right-back’s inside station offers a central outlet; the wide winger keeps a defender occupied; the far-side players give the switch somewhere to go.
What should Northbridge do when the route closes?
Suppose the opposing midfielder reaches the right-back before he can turn. Northbridge has three sensible choices, depending on the pressure and support around the ball:
- Check the receiver’s cover. If the holding midfielder is free behind the press, play back to that player; if an opponent screens the lane, recycle through a centre-back instead.
- Check the right winger’s position. If the winger has space outside the pressing player, pass into the wide lane; if the defender has closed it, keep the ball inside or return it.
- Check the striker’s separation. If the striker can receive without an opponent tight to his back, try a forward pass; if he is marked closely, use him to draw the centre-back and move the ball elsewhere.
- Check the far-side full-back. If the left-back is available beyond the opponent’s midfield, switch play; if the passing lane is blocked, circulate the ball until it opens.
- Check the nearest supporting player. If a teammate can offer a short, safe angle, combine with that player; if the receiver would be isolated, choose a backward pass and rebuild.
- Check the space behind the press. If an attacker can run into it and the passer has time, play beyond the first line; if the opponent can intercept, retain possession rather than force the ball.
Imagine the right-back has the ball, the holding midfielder is screened, and the right winger is tightly marked. The striker is also closely tracked, but the far-side left-back is free beyond the opponent’s midfield. Northbridge’s right-back returns the ball to a centre-back, who switches to the left-back. The tradeoff is clear: the team gives up an immediate forward pass, but moves the opponent across and finds an open receiver on the far side.
It is not worth assigning a fresh formation number every time a player checks toward the ball or takes a few steps to escape pressure. That turns useful movement into a blur of labels. Watch instead for repeated solutions: an extra passing angle, a free player beyond the press, or a safe route back when the forward lane closes.
What happens when possession changes?
Northbridge eventually loses the ball near the opponent’s penalty area after a winger’s pass is intercepted. Its attacking positions remain visible for a moment, but the next task is to protect the goal. The nearest midfielder presses the receiver, not to win the ball at any cost, but to slow the first forward pass.
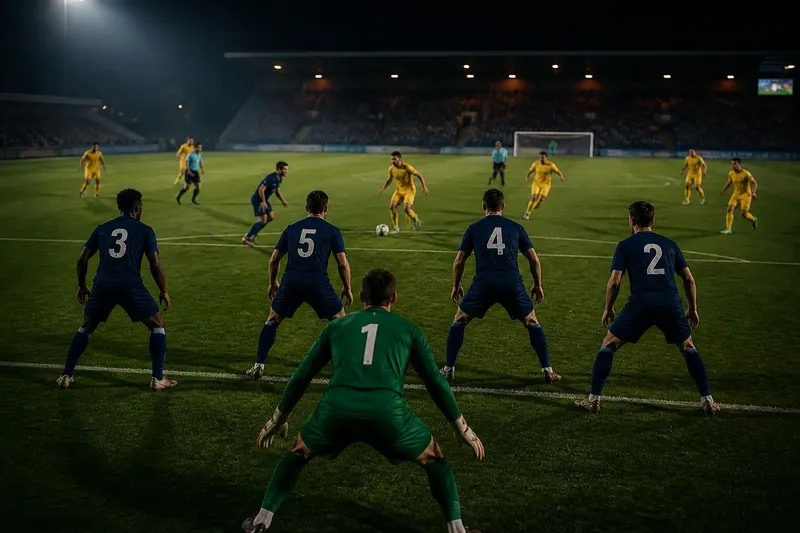
The holding midfielder shifts toward the ball, while the centre-backs guard the space behind. The right-back must recover from his central position, and the left-back checks the opponent’s wide runner. The team is briefly between its attacking and defensive arrangements. At that instant, a settled label says less than the players’ immediate choices: pressure the ball, cover the centre, track the runner.
In this invented sequence, the nearest midfielder delays the counter rather than lunging in. The opponent passes backward, giving Northbridge time to recover its shape. The observable result is not an instant regain; it is that the opposing attack loses its forward momentum and Northbridge can reorganize.
Why does the defensive shape look different?
As the opponent circulates the ball, Northbridge settles into a compact mid-block. The centre-forward and right winger stay high enough to screen central passes, while the left winger drops alongside the midfielders. The result resembles a 4-4-2: four defenders, four midfielders and two players in the first line.
When the ball goes to the opponent’s left-back, Northbridge’s right winger closes from an angle that discourages a direct pass inside. The nearest midfielder covers that inside route, and the right-back stays ready to track a run behind. When the ball travels backward, the front two adjust their positions to make a switch less comfortable. Their shared movement keeps the block connected; the label alone cannot explain that coordination.
The same player can also have different priorities across phases. Northbridge’s right-back helps create a central outlet in possession, recovers toward the flank after a turnover, and protects the space behind the winger in settled defence. The position changes, but the broader responsibility—to help secure the right side—runs through each task.
Which questions help you read a formation label?
Can one team use different shapes during a match?
Yes. A team can build with one arrangement, defend with another and pass through a temporary, unsettled shape after a turnover. Those descriptions can all fit the same players and tactical plan.
Does an inside-moving full-back become a midfielder?
Not automatically. The full-back may occupy a midfield lane during possession while still carrying defensive duties on the flank when the ball is lost or the opponent attacks.
How can you tell whether a shape is settled?
Look for players returning to repeatable positions and moving together as the ball travels. A brief scramble after a turnover is a transition, not necessarily a new defensive formation.
What should you watch when the press blocks the obvious pass?
Follow the player who moves to create a new angle, then check whether a teammate becomes free as a result. That reveals the team’s answer to the press more clearly than the formation number does.
How does the formation label help without telling the whole story?
Northbridge’s 4-3-3 at the restart offers a quick picture of its starting arrangement. The high press prompts an inside movement from the right-back, the attack spreads players across forward lanes, and the turnover demands urgent pressure and recovery. Once the opponent has settled, Northbridge forms a defensive line that resembles a 4-4-2.
Use the formation label as a starting clue, then ask what problem each movement solves. In this formation label not whole formation, the most useful details are the passing lane opened, the space protected and the player left free. Those clues let you follow the match even when the lines on the screen keep shifting.